Skip to content

Why Choose Solar Panel Roof Mounts?

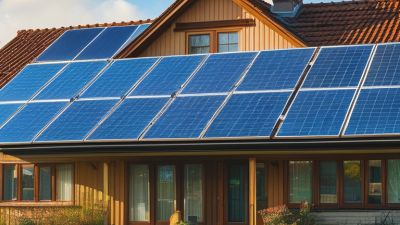
Choosing solar panel roof mounts is more than selecting brackets for a rooftop. It is a structural decision that affects safety, energy production, maintenance, and the roof’s service life. Properly designed solar panel roof mounts secure panels against wind and seasonal weather while keeping the array aligned for useful sunlight. They can also preserve valuable yard space and reduce the need for ground-based foundations. Every roof is different, though. Tile, metal, asphalt, and flat roofs require different attachment methods, sealing details, and load considerations.

A reliable evaluation begins with the roof’s age, condition, slope, and supporting structure. A qualified installer should check rafters, flashing, drainage paths, and local design requirements before installation. Small details matter. A poorly placed penetration may invite leaks months later. Excessive shading can also reduce the expected output, even when the mounting hardware looks strong. Maintenance access deserves attention too. Panels need inspection, cleaning, and occasional electrical checks. Roof mounts are not automatically the best choice. A weak roof, limited sunlight, or difficult access may make another layout more practical. That assumption deserves checking. Cost estimates should include reinforcement, permits, labor, and future roof work, not only the mounting equipment. When the design is documented clearly and installed by trained professionals, solar panel roof mounts can provide a durable foundation for a well-planned solar system. The result should feel secure, serviceable, and honestly matched to the building.
Why Choose Solar Panel Roof Mounts?

What Are Solar Panel Roof Mounts?

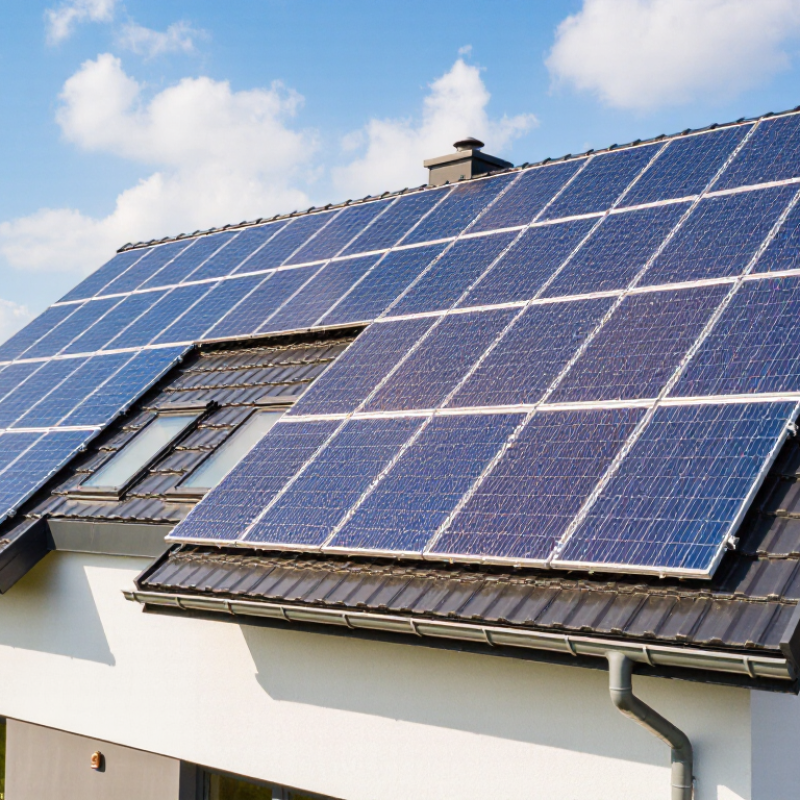
Solar panel roof mounts are the hardware that connects solar modules to a building’s roof. They create a stable platform between the panels and the roof surface. A typical system includes mounting rails, brackets, clamps, fasteners, and protective seals. Together, these parts hold panels at a useful angle and help distribute wind and snow loads.

During roof assessments, installers check more than available sunlight. They inspect roof age, framing strength, slope, drainage paths, and waterproof layers. A mount must fit the roof material, whether it is tile, metal, or asphalt shingle. On a pitched roof, brackets often attach to structural rafters beneath the covering. On a flat roof, weighted or mechanically fixed systems may keep panels at a controlled tilt. The correct choice depends on local weather, roof design, and safety requirements.

Good mounting work protects the roof while supporting long-term energy production. Seals around penetrations need careful placement, because small installation errors can become expensive leaks. I once underestimated how much roof access affects installation time. Tight spaces can slow every adjustment. That detail matters. Regular inspections should check loose clamps, corrosion, damaged seals, and shifting panels. A professional installer should follow engineering guidance and local building rules. Mounts are easy to overlook, but they carry the system through heat, rain, ice, and strong gusts.

How Roof Mounts Secure Solar Panels

Why Choose Solar Panel Roof Mounts?

How Roof Mounts Secure Solar Panels

Roof mounts do more than hold panels above shingles. They transfer wind and snow forces into the roof structure. A reliable system uses rails, brackets, flashing, and clamps sized for the roof type. Installers should fasten brackets into rafters or approved structural members, not weak roofing material. Proper flashing also limits water entry around each penetration. Small details matter.

The U.S. Department of Energy states that residential solar systems commonly operate for 20 to 30 years. During that time, mounting hardware faces heat, rain, vibration, and corrosion. NREL research on photovoltaic reliability highlights the importance of installation quality and long-term inspection. A perfect-looking array can still hide loose fasteners. I would not treat a generic bolt count as proof of safety. Local wind uplift, snow load, roof age, and slope must guide the design.

Tips: Ask for the structural load calculation and waterproofing method. Check whether clamps match the panel frame. Inspect visible hardware after severe weather. Keep records of torque checks and roof repairs. One overlooked seal can become an expensive lesson. The IEA PVPS Trends in Photovoltaic Applications 2024 report recorded more than 1.6 terawatts of global solar capacity, making dependable mounting increasingly important.

Why Choose Solar Panel Roof Mounts? - How Roof Mounts Secure Solar Panels

Mounting Consideration How It Secures the Panels Typical Roof Application Key Benefit Important Design Factor
Flush-mounted system Roof attachments connect to structural members, while rails and module clamps hold the panels in place. Sloped asphalt-shingle, metal, tile, and slate roofs. Low profile, reduced wind exposure, and efficient use of roof area. Attachment locations must align with rafters or other approved structural support.
Tilted rack system A raised frame supports the modules at a selected angle and transfers wind and snow forces to roof attachments or ballast. Flat roofs and roofs where additional panel tilt is required. Can improve orientation, row spacing, and access for maintenance. Higher tilt can increase wind uplift and may require greater structural capacity.
Ballasted mounting Weighted blocks resist sliding and uplift without regularly penetrating the roof membrane. Many low-slope commercial roofs with suitable structural capacity. Can reduce roof penetrations and simplify waterproofing management. The roof must safely support the added dead load and resist wind movement.
Rail-based mounting Continuous rails are fastened to roof attachments; mid-clamps and end-clamps grip the module frames. A wide range of pitched-roof installations. Offers flexible panel positioning and distributes loads across multiple attachment points. Rail spans, fastener spacing, and clamp compatibility must follow engineering requirements.
Rail-less mounting Specialized attachments connect more directly to the roof structure and secure panels with approved clamps. Regularly shaped roofs with accurately located structural members. Uses fewer components and may reduce system weight and installation time. Precise layout is essential because attachment points have less positioning flexibility.
Roof attachment and flashing Metal attachment hardware transfers loads to rafters or trusses, while flashing helps direct water around penetrations. Penetrating systems on sloped or low-slope roofs. Provides a direct structural load path when correctly installed. Waterproofing details must be compatible with the roof covering and installation method.
Module clamps End-clamps secure the outer edges, while mid-clamps secure adjacent panels along the mounting rail or frame. Most framed solar panel arrangements. Allows panels to be held without drilling through the module frame. Clamp location and torque must comply with the panel manufacturer’s installation instructions.
Material durability Corrosion-resistant aluminum and galvanized or stainless-steel components maintain mechanical connections outdoors. Residential, commercial, coastal, and high-humidity environments. Supports long-term exposure to sunlight, rain, temperature changes, and moisture. Material compatibility is important to limit galvanic corrosion between dissimilar metals.
Wind resistance Attachments, rails, clamps, and the roof structure work together to resist uplift, sliding, and lateral forces. All roof-mounted solar installations. Reduces the risk of panel movement when the system is engineered and installed correctly. Local wind speed, exposure category, building height, roof geometry, and array layout affect design.
Snow and drainage The mounting layout supports the panels while preserving required drainage paths and accounting for snow accumulation. Cold or snowy climates and roofs with drainage-sensitive coverings. Helps prevent blocked drainage and excessive structural loading. Ground snow load, roof slope, panel clearance, and local building requirements must be evaluated.

Note: Mounting selection, attachment spacing, fastener type, waterproofing details, and structural capacity should be verified against the roof condition, local building codes, site-specific wind and snow loads, and the solar panel installation instructions.

Key Benefits of Choosing Roof-Mounted Solar Systems

Why Choose Solar Panel Roof Mounts?

Roof-mounted solar systems use existing space above your home, leaving gardens, driveways, and patios available. This can matter on compact properties. Panels also receive fewer shadows when installed on an open, elevated roof. More consistent sunlight can improve daily energy production.

A roof mount can reduce ground preparation and protect panels from accidental contact. Raised panels also allow airflow underneath, helping manage heat during hot afternoons. During a professional site assessment, installers check roof condition, pitch, structure, drainage, and local requirements. A strong roof matters. Mounting panels on damaged shingles may create avoidable repair costs later. The system should also include safe wiring routes and weather-resistant fittings.

Tips: Ask for a written roof inspection before installation. Request projected output for winter and summer. Check whether roof repairs should happen first. Keep a clear service path around panels when possible. Do not assume every south-facing roof is ideal; nearby trees, chimneys, and seasonal shadows can change the result. A roof-mounted system is efficient, but it is not perfect for every building. Older roofs, weak structures, or unusual shapes may require reinforcement or another mounting option. Even small planning details can affect safety, maintenance, and long-term performance.

Roof Types and Mounting Options to Consider

Why Choose Solar Panel Roof Mounts?

Roof type determines the mounting method, installation risk, and long-term maintenance needs. Asphalt shingle roofs usually suit railed mounts with carefully sealed penetrations. Standing-seam metal roofs can use non-penetrating seam clamps, preserving the roof surface. Tile roofs need replacement hooks or specialized flashing, because cracked tiles can invite leaks. Flat roofs often use ballasted systems, but structural checks remain essential. According to IEA PVPS Trends 2024, distributed solar represented about 42% of global photovoltaic additions in 2023. That growth makes roof compatibility increasingly important.

Solar orientation and roof pitch also affect energy production. A south-facing roof often performs well in the Northern Hemisphere, but shading, ventilation, and local weather may matter more than direction alone. Snow regions require stronger attachment points and careful load calculations. Coastal areas may need corrosion-resistant hardware. Field experience shows that rushed flashing work creates avoidable problems. The panel is rarely the weakest link.

Tips: Ask for a roof inspection before choosing mounts. Confirm wind and snow loads with a qualified installer. Request a drainage plan for flat roofs. Check tile condition around every attachment. NREL’s PVWatts guidance also recommends using site-specific tilt, azimuth, and shading inputs instead of relying on rough estimates. I would not select a mounting system from appearance alone. A clean layout can still hide poor access for future repairs.

Why Choose Solar Panel Roof Mounts? Roof Types and Mounting Options to Consider

Roof material and geometry determine the most practical mounting method. Pitched shingle and tile roofs commonly use rails with roof attachments, standing-seam metal roofs can use seam clamps without roof penetrations, and flat membrane roofs often use ballasted or mechanically attached tilted systems. Final selection should account for structural capacity, wind loads, waterproofing, roof condition, and local building codes.

Installation, Maintenance, and Safety Requirements

Why Choose Solar Panel Roof Mounts?

Installation, Maintenance, and Safety Requirements

Solar panel roof mounts use existing roof space without consuming valuable ground area. The IEA PVPS Trends 2024 report recorded about 456 GW of new photovoltaic capacity worldwide in 2023. That growth increases demand for safer, more disciplined rooftop work. Before drilling, installers should verify roof age, rafter strength, wind exposure, and drainage paths. A structural engineer may be necessary for older buildings. Small mistakes become expensive leaks.

Mounting hardware must resist uplift, corrosion, and thermal movement. Installers should follow the project design, local building codes, and relevant electrical standards, including IEC 62446-1 for system verification. Fall protection is essential during lifting and fastening. Workers need guarded access, stable platforms, and insulated tools.

It sounds obvious. It is still missed. Cables should remain secured, protected from sharp edges, and separated from standing water. Fire access routes must not be blocked.

Maintenance is less dramatic but equally important. A practical inspection checks loose fasteners, cracked seals, corrosion, cable damage, shading, and unusual heat marks. Thermal imaging can reveal failed connections before visible damage appears. Inspection after severe wind or hail is sensible, even when panels look normal. The National Renewable Energy Laboratory has reported that rooftop photovoltaic risks often involve installation quality, weather exposure, and electrical faults. Cleaning schedules should reflect local dust and rainfall, not a fixed calendar. Perfect maintenance plans rarely survive real roofs; records, photographs, and honest reassessment work better.